For the main part of my Dorothy costume (see here) I needed a blue pinafore. In the depths of my mind (and my wife reminded me) I remembered some blue and white dotty fabric that I had lurking from back when I made my coat a couple of years ago. I fished it out of its storage place and began thinking about how to make it into a Dorothy-worthy pinafore. I had already decided by this stage that I would wear a blue skirt of my wife's and that the pinafore was only an overgarment. I therefore decided to make it a little more like an apron, as I figured that would both be easier and use less fabric.
I started with the middle of the pinny/apron, using the tie from the skirt I intended to wear as a guide to make a thick waistband.
Next, I made up some pieces for the skirt and the top section of the pinny, again using the blue skirt as a guide for some of it, and completely making up the top section by sketching it out on the fabric.
Then it was time to start actually sewing some of these pieces together! So off I went, starting with hemming the top section on three sides, before attaching both the top piece and the skirt piece to the waistband.
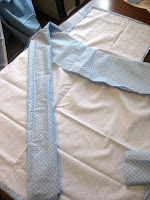
Next came hemming the remaining sides of the skirt piece, before making some strips for the tie of the pinafore, and attaching them to the ends of the waistband. The length of those strips was gauged by again using the tie from the blue skirt.
It was then time to add the reverse side to the pinafore tie and the waistband, which simply required using the same sized and shaped pieces, sewing them together and then attaching them, right sides together, to the existing waistband and tie, leaving a gap for turning the right way round after clipping the corners. To sew up that gap, I simply ironed under the seam allowance and sewed along the edge, across the base of the waistband.
I then top-stitched around the waistband and tie to help keep them the right shape, and moved onto attaching a pocket to the front of the skirt. This pocket was simply sketched out, using the shape of the skirt itself to guide me, before cutting out, hemming the top edge, ironing the other edges under and then sewing onto the centre front of the skirt.
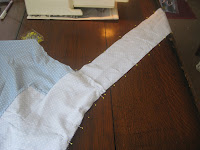
At this stage the pinafore was definitely taking shape, with just the straps to add. To make these, I cut strips the determined width, and then pinned them onto the pinafore before asking my wife to help me work out just how long they needed to be to fit comfortably. I then sewed them right sides together, clipped the corners and turned them the right way out before top-stitching and then attaching one end of each strap to the waistband. To make this join secure, I stitched a rectangle at the base of the strap and then reinforced it with a cross in the middle.
Finally, I added buttonholes to the straps and buttons in the corresponding place on the top piece of the pinafore. These buttons were simply ones I had stashed away and thought matched this project appropriately.


No comments:
Post a Comment