Pages

Tuesday 26 February 2013

Craft to do list

Currently, I'm working on about several separate projects, all of which, surprisingly, are for me! I therefore am lagging behind in completing (or making real headway) in any of them. So, here's a list of what I'm currently crafting, or am meant to be crafting:

1. H.M.S. Victory model
This plastic model kit is one I bought for myself at Christmas with some Christmas money. It's been out of its box and occupying this coffee table since the very beginning of January. This is my weekend project at the moment as I don't find the light good enough in the evenings (even with a table lamp) so it's taking a pretty long time. I'm really looking forward to having this one finished (hopefully soonish) as it takes up a whole table! There are pretty much just the masts and sails left to do though so I'm hoping I'll have it done before too long.

2. 'Sampler des 4 saisons' cross-stitch
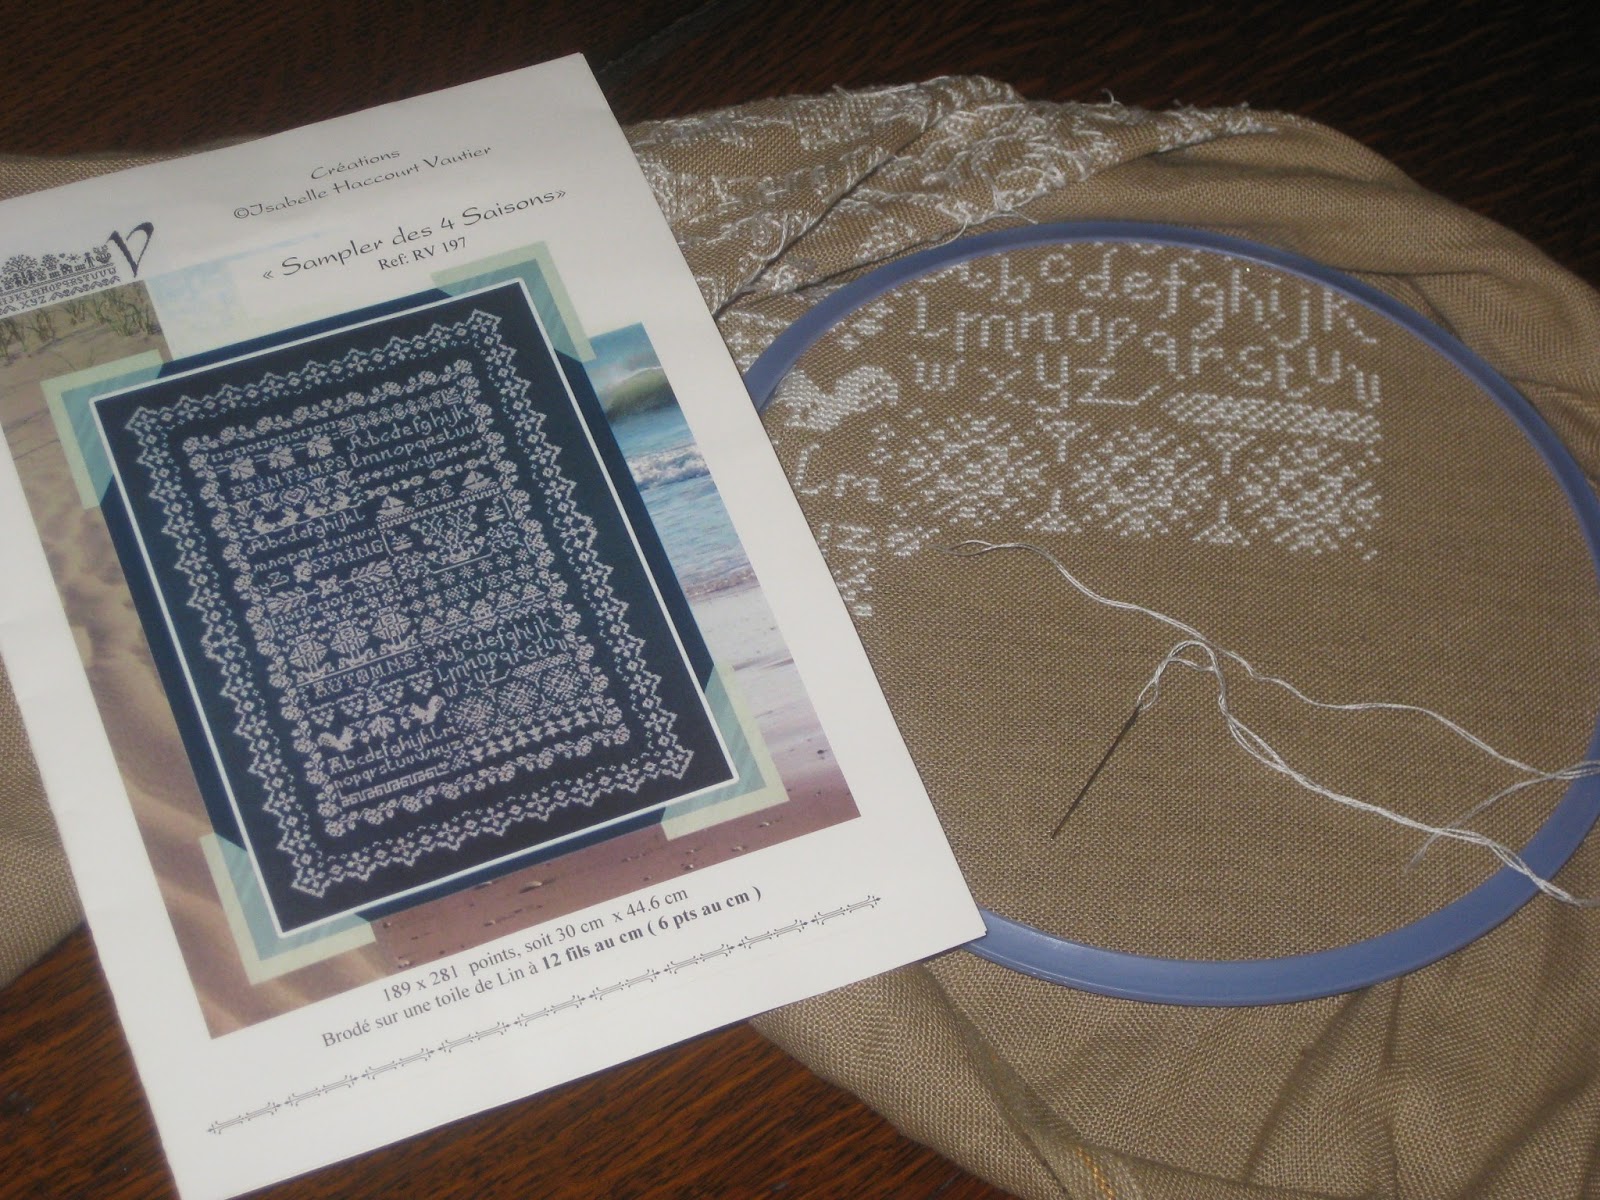
This is a cross-stitch I started back in March of last year, and has been packaged away until now, and blogged about here. I've been working on this again for about two weeks now, and am nearing completion of the middle section of the design. After that there'll just be the two borders to do. I'm currently finding that this is an excellent evening craft as it doesn't stop me watching TV and is also something I can do even with cold hands!

3. Hexagon quilt
As mentioned here, I'm intending on making a hexagon quilt, and as this is the craft I've most recently decided to do, it's the one I'm most excited about! So far, I've just decided on making the hexagons 7/8" and have printed out 480 little hexagons on regular printer paper. They now all need cutting out before I can start making the fabric hexagons so this is something I've been doing some evenings when I haven't felt like cross-stitching. I've done about half of the hexagons so far, and have been placing them in an origami box that I made from the box for my H.M.S. Victory model so it's nice and sturdy. This is taking a fair while, and it probably should be the last craft on my list, but I'm too excited about getting properly started on it!

4. Knitted Whippet
Like the pug I made in December (see here), this is a dog that I'm knitting for my friend (well, actually, her Mum). I haven't yet started this project, but have recently bought the wool. The whippet I will make was requested to be completely mink coloured, so that makes it easier in terms of the knitting as I won't need to change colour. This project doesn't need to be finished until mid-April so it's not particularly urgent and therefore I'll get to it at some point. 

5. Knitted English Bull Terrier 
Again, this knitted dog is for the same friend who wants the whippet, and is even less urgent as she doesn't need it completed until the summer (i.e. July). Again, I've recently bought the wool (at the same time as for the whippet), and will start it once I've at least finished the other knitted dog.

So, there you have my current craft list. I'm pretty excited about each of the projects (which helps), and they're keeping me plenty busy! I'll keep you posted about how each of them goes; I just don't know how long they will take!
       

Thursday 14 February 2013

All sewn up

You may recall that back in May of last year, I laid out the Birthday Blanket (as blogged about here) and began the rather large job of sewing all 121 squares together. Yesterday I finally completed that task and gave the finished thing to my wife. She was rather surprised as she had no idea I'd recently been sewing together the last couple of rows, but loved the finished product. 

I know you're wanting to see the blanket now, so here's a photo of it on our double bed (to give you an idea of size):


After all that hard work (and time), laying the blanket out on the bed was very satisfying for me. It was also the first time I really knew the size of the blanket. Upon finding this out, I realised that although the blanket is wide enough for a double bed, it's not quite long enough. This may not be a problem at all, depending on whether we use this blanket as a bed blanket, or as a throw for use on the sofa. It's therefore possible that this blanket still isn't finished! I may yet add a couple of rows to make the blanket that little bit more bed-sized and it's still possible that I'll add a border of some kind, just to finish off the edges.

But, for now at least, this blanket is finished, a year and four months after I started making it!
       

Wednesday 13 February 2013

Patchwork pieces

While we were walking round the shops sometime at the beginning of January (a while ago, I know), I found that Oxfam was selling packs of pre-cut patchwork pieces. They had two different options: a pack of 12 larger sized squares of sari fabric for £3.99, and a pack of 60 smaller squares of cotton fabric for £4.99. Both gave plenty of interesting patterns and a mix of colours, which I thought would look great in a quilt. 

Then, a couple of weekends ago, my wife's friend came around to borrow my sewing machine to make a patchwork quilt for her sister's birthday. This reminded me of the squares in Oxfam and so I sent my wife off the very next day to come back with a couple of packs for me; I didn't want to miss out on them!

We decided that it was more economical to buy the smaller sized squares as there were so many more in each pack, and that two packs would probably be adequate. Didn't want to go crazy, now. I figured that at £4.99 each they were quite a bargain and having enough fabric for the face of a quilt for under £10 was pretty good. Here are the packs that my wife came back with:


The first thing that both of us wanted to do was look through the different fabrics that were included, so here's a quick sample of those fabrics:


While I had just assumed that I would make a patchwork quilt using the pieces as the 11.5cm squares they came as, my wife then suggested that she might like a quilt made from hexagons. This then resulted in some researching on the web, resulting in me finding the traditional paper piecing method of making quilts. My wife thought they looked awesome, and I was becoming increasingly swayed (you know I like to try something new!). 

So, I was pretty much convinced on making a quilt using that method, but the next thing to decide was what size the hexagons would need to be. I managed to find a 'hexagon cutting guide' here, which allowed me to work out what size hexagon these squares would produce. Based on the squares being around 4.5" they would produce 2" hexagons. I then managed to find a printable for 2" hexagons here and laid one of the hexagons over a square to see how it would look. 


I decided that I thought these hexagons would be too large for the quilt, and had a think about whether I could use smaller hexagons without wasting too much fabric, as that would be no good! Dividing the square into four, I figured that I could get four 0.75" hexagons from each square of the fabric, so I went looking for a printable of hexagons that size. I found one here, and printed one of those out. These hexagons were significantly smaller than the first I printed, and seemed much cuter and more delicate. I laid four of these onto a patch:


The size of these hexagons definitely appealed to me more, although I'm aware that it would be four times as much work! So, I'm thinking that at some point (probably not in the too distant future) I'll start on making these patches into a traditionally paper pieced quilt. Here's looking forward to that!
       

Monday 11 February 2013

Who doesn't love a tea cosy?

Well this is a new one, finishing a present way before it's due to be given. My wife and I spent the past weekend back at my Mother's house in Kent, and I knew that this would be the last time we went back before her birthday. Seeing as I wanted to make sure the tea cosy that I'm planning on giving my Mother for her birthday (in March) would fit her teapot, I figured I'd best take it back with us so I could do the sewing up there. 

For the last week or so, I'd been knitting up the pieces for said tea cosy, which was a pattern I found on Ravelry. I made sure that I was at the sewing up stage before we travelled home, and while my Mother was out yesterday morning, sewed them up.


Now I just need to keep hold of the tea cosy until the middle of March, when we'll either post it home or deliver it when we next go back. 

Here's hoping she'll like it as much as I'm pleased with how it turned out!
       

Tuesday 5 February 2013

Why not dye?

While we were at my Mother's for Christmas, she offered me the two sets of bedlinen that used to be mine when I still lived at home. Seeing as they're still in relatively good condition and we enjoy free things, we said yes and brought them both back to Oxford. The only thing we disliked about the two sets was that they're the same. 

Therefore, when my wife suggested that we dye one set, I got all excited and we popped to Hobbycraft at the weekend. We had already looked at the different colours we could buy and decided we wanted the Tulip Red Dylon machine dye. Thankfully they had that specific colour and we snapped up a pack for £6.49. We then also bought the 500g pack of salt for £1.
Upon getting home, we brought out the duvet cover and four pillowcases:
Following the instructions on the packet, we put the linen in for a quick wash so it was damp,
poured the dye mix into the drum, covered it with the salt and added the linen back into the machine. We then did a 40° cycle, added a liquitab when it was finished and reran the 40° cycle until the dyeing stage was finally finished!
We still had to run another 40° cycle with another liquitab to try to clean out the machine. We don't want all our clothes being dyed, and hung out the bedlinen to dry.

Because we didn't use any pre-dye, the colour wasn't as red as it would probably otherwise have been, but we'd decided we wanted to try to make a deeper red and hence left the linen as it was to begin with.

Anyways, here's the finished result (please excuse the terrible lighting, but it was dark)
And for comparisons sake, here's the other set to show the colour difference:
Although the colour didn't come out quite as we expected, we're still happy with it and glad we decided to dye the set. 
       

Saturday 2 February 2013

Charity Shopping

Since today was (is) such a beautiful looking day, my wife and I decided to go on a little jaunt. We had a quick look at google maps to decide where we'd walk and chose to walk up to South Park in Oxford. We figured this would be a nice little walk, and after checking which roads we needed to look out for, set off. 

Upon getting to the park, we realised it was much too cold for just sitting around, although the view was gorgeous, and decided to continue on, into Headington, where we thought we'd scope out the charity shops. 
View of Oxford from South Park
We know that there are many charity shops in Headington and that they have a generally good range and quality of products as we have visited them many times, and even bought a large proportion of our wedding crockery/glassware from them. 

One of the charity shops in particular proved to be excellent this morning, with a 'camera special' occurring this weekend. There were plenty of old cameras, with a polaroid that I quite wanted. We however decided not to get it as it would be so expensive to buy film :(

In the end, we ended up buying something much more exciting though: handfuls of photo slides. There was a basket of them in the front of the shop with a tag outlining they were 20 for 99p. What a bargain! We therefore spent quite a while having a look at the different slides, some of which seemed to be high quality images and rather nice. We ended up buying 40 of them, so our total purchase was just under £2, and we knew we'd be able to make something with them. 
And just to give you an idea of the kinds of images we bought, I've tried to take pictures of a couple of them, although it didn't work out too well!
At some point we think we might make a lampshade (or two) out of the slides (as shown here), although we have no immediate plans to do this. I'm also relatively sure that my Grandad has more of these slides that his aunt took, so if it works out well with these slides, we may at some point reclaim those and put them to good use also! All in all, an excellent Saturday afternoon walk and a marvellous purchase.