 Back when I moved to uni my wife gave me a recipe book which had her family recipes in it. This is the recipe book we've used since and added to with a couple of new recipes. However, it's not very big and with an ever-increasing number of magazine cutouts that don't fit in the recipe book, I wanted to make a new one - not that I love our little one any less mind you.
This is where the rest of our purchases from Dalbe (as mentioned here) come in. As I knew that I wanted to make this recipe book I thought being given vouchers for an art shop was the perfect time to get my supplies as otherwise who knows what I'd have come out with!
And this is what I bought ...
Included in that pile is:
- 10 sheets of 160 gsm A2 paper in two different colours,
- one sheet of 1.5 mm foam board,
- a 60 cm roll of paper-backed fabric,
- one 50 x 70 cm piece of decorative paper
I knew that I wanted to construct the recipe book in a traditional manner, using signatures and sewing them together. I used this tutorial as the basis for our recipe book and here's how it went ...
I started out by folding and cutting each of the 10 A2 sheets of paper in half lengthwise. After this I cut 5 cm off the right edge of each sheet to make the pages and the spacers for the book. (I decided to use spacers for this book as a means to attach recipes that are double-sided, and also to make sure the book doesn't get overfilled by sticking in photos and clippings.)
The next step was to fold each of the pages and spacers in half which I did individually, considering the weight of the paper, to try to make sure they were as accurate as possible. As the spacers were pretty small and I therefore found them quite tricky to fold accurately, I first scored each one down the middle using my ruler and a knitting needle. Each page was then pressed along the fold using the back of a metal spoon to make a nice crisp fold.
I then organised these pages and spacers into signatures using two pages of one colour and two spacers of the other paper colour.
The next step was to punch the holes into each signature to facilitate the sewing. This was done by marking holes 1, 4.5, 8, 11.5, 13.5, 17, 20.5 and 24 cm along the fold of one of the spacers to use as a guide. This guide was then laid on the top of each signature to show where I needed to punch through. I used pegs to hold the pages together while I did this in an effort to make sure the holes remained accurate.
The signatures were then organised into their final order and the sewing commenced.
To sew the book together I used some leftover embroidery thread from the 'Un Jour à la Montagne' cross-stitch.
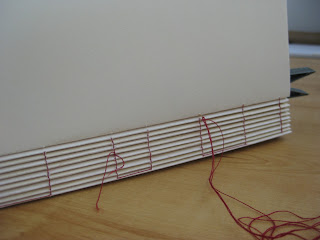
While I was sewing I found it most useful to flip the book between two positions depending on whether I was working on the new signature or the one immediately before it. These were the two positions I made most use of:
After all the signatures were sewn together, I glued over the spine of the book with the only glue I had available and used pegs to hold them in place while they set.
I then focussed my attention on the cover for the recipe book, measuring out two pieces of foam board 26 x 30.5 cm and one piece 26 x 2 cm. I used masking tape to tape the three pieces together with 3mm between each piece.
The foam board cover then needed to be covered in the paper-backed fabric which I did by glueing the foam board to the fabric, folding over and glueing the corners and then glueing each of the edges, trying to make sure the fabric was taut at all times.
Then it was time to assemble the book together.
I taped the bookmark I had made from some more embroidery thread onto the spine of the signatures, and used some more masking tape to help hold that together more securely.
The decorative paper was cut into two pieces 25 x 60 cm and each was folded in half.
The first endpaper was then glued onto the first page of the book before being glued onto the cover to attach the signature into the cover, making sure that there was an even gap around each edge.
This was then repeated for the back of the book, trying to make sure the signatures sat back against the spine. I then placed the finished book under weight (which happened to be two wine boxes) to hold it all in place while the glue dried.
And there you have our new recipe book, ready for putting all our yummy recipes in.


