Pages

Friday, 29 March 2013

Hexagon preparation

As mentioned here, I have been working on a paper pieced hexagon quilt. I have found the beginning stages a little tedious, and it took far longer than I expected to cut out 480 little hexagons. However, this has now all been done and the next step was to add fabric to each of these hexagons.

Here is a quick outline of the process I followed for turning the 11.5cm square pieces of cotton into the 7/8" hexagons.
I firstly cut each of the cotton squares into quarters.
Next, I folded one of the fabric squares around two edges of a hexagon, making sure to make the creases good and crisp, and pinched them firmly at the point. I then pushed my tacking thread through the fabric and paper near to that point, before making a small stitch to secure itself.
I continued around to the next point of the hexagon, folding firmly over the edge and securing with the thread. 
This process was continued until I had folded over each of the six edges of my hexagon, and I secured the thread with a small stitch on the wrong side of the hexagon, going through both layers of fabric.
This process left me with one small fabric-covered hexagon, all ready for sewing together to make my quilt top.

As it turned out, there were not 60 squares of fabric in each of the packs I had bought. Instead, I was missing around 12 of the squares I thought there would be, and one of the squares was missing some fabric, meaning I could only get two hexagons from it. This therefore meant I was approximately 50 hexagons shy of where I thought I'd be, but that should still be fine for the design I have intended for my quilt.

Here are around half of the prepared hexagons, just to give an idea of some of the fabrics that will be going into my quilt top.

Now that I've finished adding all of the fabric to my hexagons, I'm ready to start sewing them together, and I really am rather excited about that!
       

Tuesday, 26 March 2013

Toto

The third and final part of the Dorothy costume I made for World Book Day (see here) was not something to wear, but rather an accessory to place in the pocket of the pinny I was wearing. It also happened to be the favourite part of my costume for the children at school. I made a knitted Toto. 

To make the dog, I used the book, 'Best In Show: Knit Your Own Dog', as I did when making the pug for my friend, and chose to make the West highland Terrier, and used some wool that I had stashed away from making a bear for my wife several years ago. 


The wool I used made it rather interesting to sew up the dog as it made seeing the individual stitches rather tricky. I took this as both a good and a bad thing though as it meant that although I couldn't be as accurate in the stitching as I might usually be, I figured that equally, nobody would be able to tell!


After I'd finished knitting and sewing up Toto, I made him a little name tag from a length of ribbon and a small circle of card which I simply hole punched and threaded onto the ribbon.

So, there you have it, the final piece of my Book Day costume, all of which cost me £6 in total, and was mostly made up of materials I already owned. It also took only about a week of my time, so all-in-all, took much less time than it's taken me to blog about them!
       

Saturday, 23 March 2013

One blue pinny

For the main part of my Dorothy costume (see here) I needed a blue pinafore. In the depths of my mind (and my wife reminded me) I remembered some blue and white dotty fabric that I had lurking from back when I made my coat a couple of years ago. I fished it out of its storage place and began thinking about how to make it into a Dorothy-worthy pinafore. I had already decided by this stage that I would wear a blue skirt of my wife's and that the pinafore was only an overgarment. I therefore decided to make it a little more like an apron, as I figured that would both be easier and use less fabric.

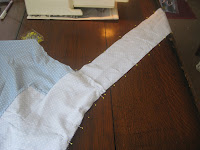
I started with the middle of the pinny/apron, using the tie from the skirt I intended to wear as a guide to make a thick waistband.
Next, I made up some pieces for the skirt and the top section of the pinny, again using the blue skirt as a guide for some of it, and completely making up the top section by sketching it out on the fabric. 

Then it was time to start actually sewing some of these pieces together! So off I went, starting with hemming the top section on three sides, before attaching both the top piece and the skirt piece to the waistband. 

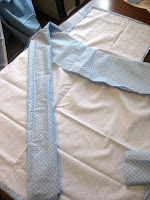
Next came hemming the remaining sides of the skirt piece, before making some strips for the tie of the pinafore, and attaching them to the ends of the waistband. The length of those strips was gauged by again using the tie from the blue skirt. 

It was then time to add the reverse side to the pinafore tie and the waistband, which simply required using the same sized and shaped pieces, sewing them together and then attaching them, right sides together, to the existing waistband and tie, leaving a gap for turning the right way round after clipping the corners. To sew up that gap, I simply ironed under the seam allowance and sewed along the edge, across the base of the waistband.


I then top-stitched around the waistband and tie to help keep them the right shape, and moved onto attaching a pocket to the front of the skirt. This pocket was simply sketched out, using the shape of the skirt itself to guide me, before cutting out, hemming the top edge, ironing the other edges under and then sewing onto the centre front of the skirt. 

At this stage the pinafore was definitely taking shape, with just the straps to add. To make these, I cut strips the determined width, and then pinned them onto the pinafore before asking my wife to help me work out just how long they needed to be to fit comfortably. I then sewed them right sides together, clipped the corners and turned them the right way out before top-stitching and then attaching one end of each strap to the waistband. To make this join secure, I stitched a rectangle at the base of the strap and then reinforced it with a cross in the middle. 

Finally, I added buttonholes to the straps and buttons in the corresponding place on the top piece of the pinafore. These buttons were simply ones I had stashed away and thought matched this project appropriately. 

And there you have it, one Dorothy pinafore, all finished. Not too bad for a made-up pattern, if you ask me.


Saturday, 16 March 2013

Ruby Slippers

The first part of the World Book Day costume (see here) that I made was the ruby slippers that Dorothy wears. I figured that these might be the single most important component of the costume and it was therefore vital that I had them sorted. The initial step was finding a pair of shoes that I could customise, and so I had a hunt through the old shoes I owned, thinking I had some old ballet pumps somewhere. Unfortunately I couldn't find any of the pairs I thought I owned still, so off to ASDA Living we went in the hope of getting some cheap ones. 

I managed to find some pretty comfortable shoes, as they were softer than most. I figured this was important as I didn't have time or the opportunity to wear them in before I had to wear them for my costume. They were also only £6 which I thought was pretty reasonable!

The first step to customising them into ruby slippers was to paint the denim fabric with red fabric paint so that if any of the glitter I was to put on them were to come off then it wouldn't be quite as obvious. I therefore grabbed my leftover Dylon fabric paint and simply painted a coat all over the shoes. 


I left the paint to dry (while getting on with other aspects of the costume) and then came back to them to compete the next step. Technically, the next step would be to iron the paint to set it and then wash the fabric, but as these are shoes ironing them was difficult. I therefore skipped the setting and washing of the fabric paint, and moved onto adding the glitter to the shoes. Who doesn't love adding glitter to things?! 

To make these shoes all glittery, I simply brushed on some PVA glue (in sections, so it didn't dry out too much) and then shook on some red glitter (again, I already owned this).


After repeating the process all the way around both shoes, I ended up with two rather sparkly shoes, and was rather impressed at how good they were looking!

I wanted to make sure that the glue was completely dry before I did the final step of the process, so I left them alone for 48 hours. Then it was simply a case of spraying them with hairspray in an attempt to make sure the glitter stayed (at least for one full day). In the end I gave each shoe three coats of hairspray, and they did thankfully keep their glitter remarkably well!

So, there you have it, Dorothy's ruby slippers, DIY-style!
       

Thursday, 7 March 2013

World Book Day

So, today is World Book Day, and as I work in a school, I actually dressed up this year. For the first time in a veeerrrry long time. For quite a while, I was unsure what to dress up as; after all, there is an awful lot of choice! I also wanted the children I work with to stand a chance of guessing who I was (or at least understanding once I'd told them!).

Then, on Saturday, as I was knitting the whippet for my friend (as mentioned here), I thought about going dressed up as Dorothy from the Wizard of Oz. That was that, decision made. I then set about making up a costume, seeing what items of clothing I could use, and what I'd need to make/buy.

Here's the finished costume, as worn today:

And here's a quick run-down of the constituent parts:
  • Owned skirt
  • Owned white top
  • Shop bought and modified shoes
  • Homemade pinafore apron
  • Homemade Toto
Over the next couple of days I intend to share the making of those parts I did make, but until then, I'll just leave you to enjoy my ever-so-beautiful (or not) costume and the rest of World Book Day.